Auto Resizing

There are iOS devices with different screen sizes. Of course, this must also be taken into account when designing an app. For example, if you want a label to extend from the left edge of the screen to the right edge, it is not sufficient to assign a fixed width value to this label. This is because the width on the iPhone in portrait format is clearly different from, for example, the iPad in landscape format. Thus, the width of the label must be defined in such a way that it dynamically adapts to the width of the screen.
Let’s take this example and put it into practice.
- To do this, first drag a label to the center of your work space.
- To make it easier for us to observe the width, give the label a background color of your choice.
- Now select the label. The label now has a grey frame and two blue dots are displayed on the left and right.
- Drag the left point with the mouse to the left until a vertical dotted line appears.
- Drag the right point with the mouse to the right until a vertical dashed line appears.
- Activate the horizontal line in “Auto Resizing”. This should then be displayed in red.
- Check whether the left magnet is active (red). If this is not yet the case, activate it by clicking on it.
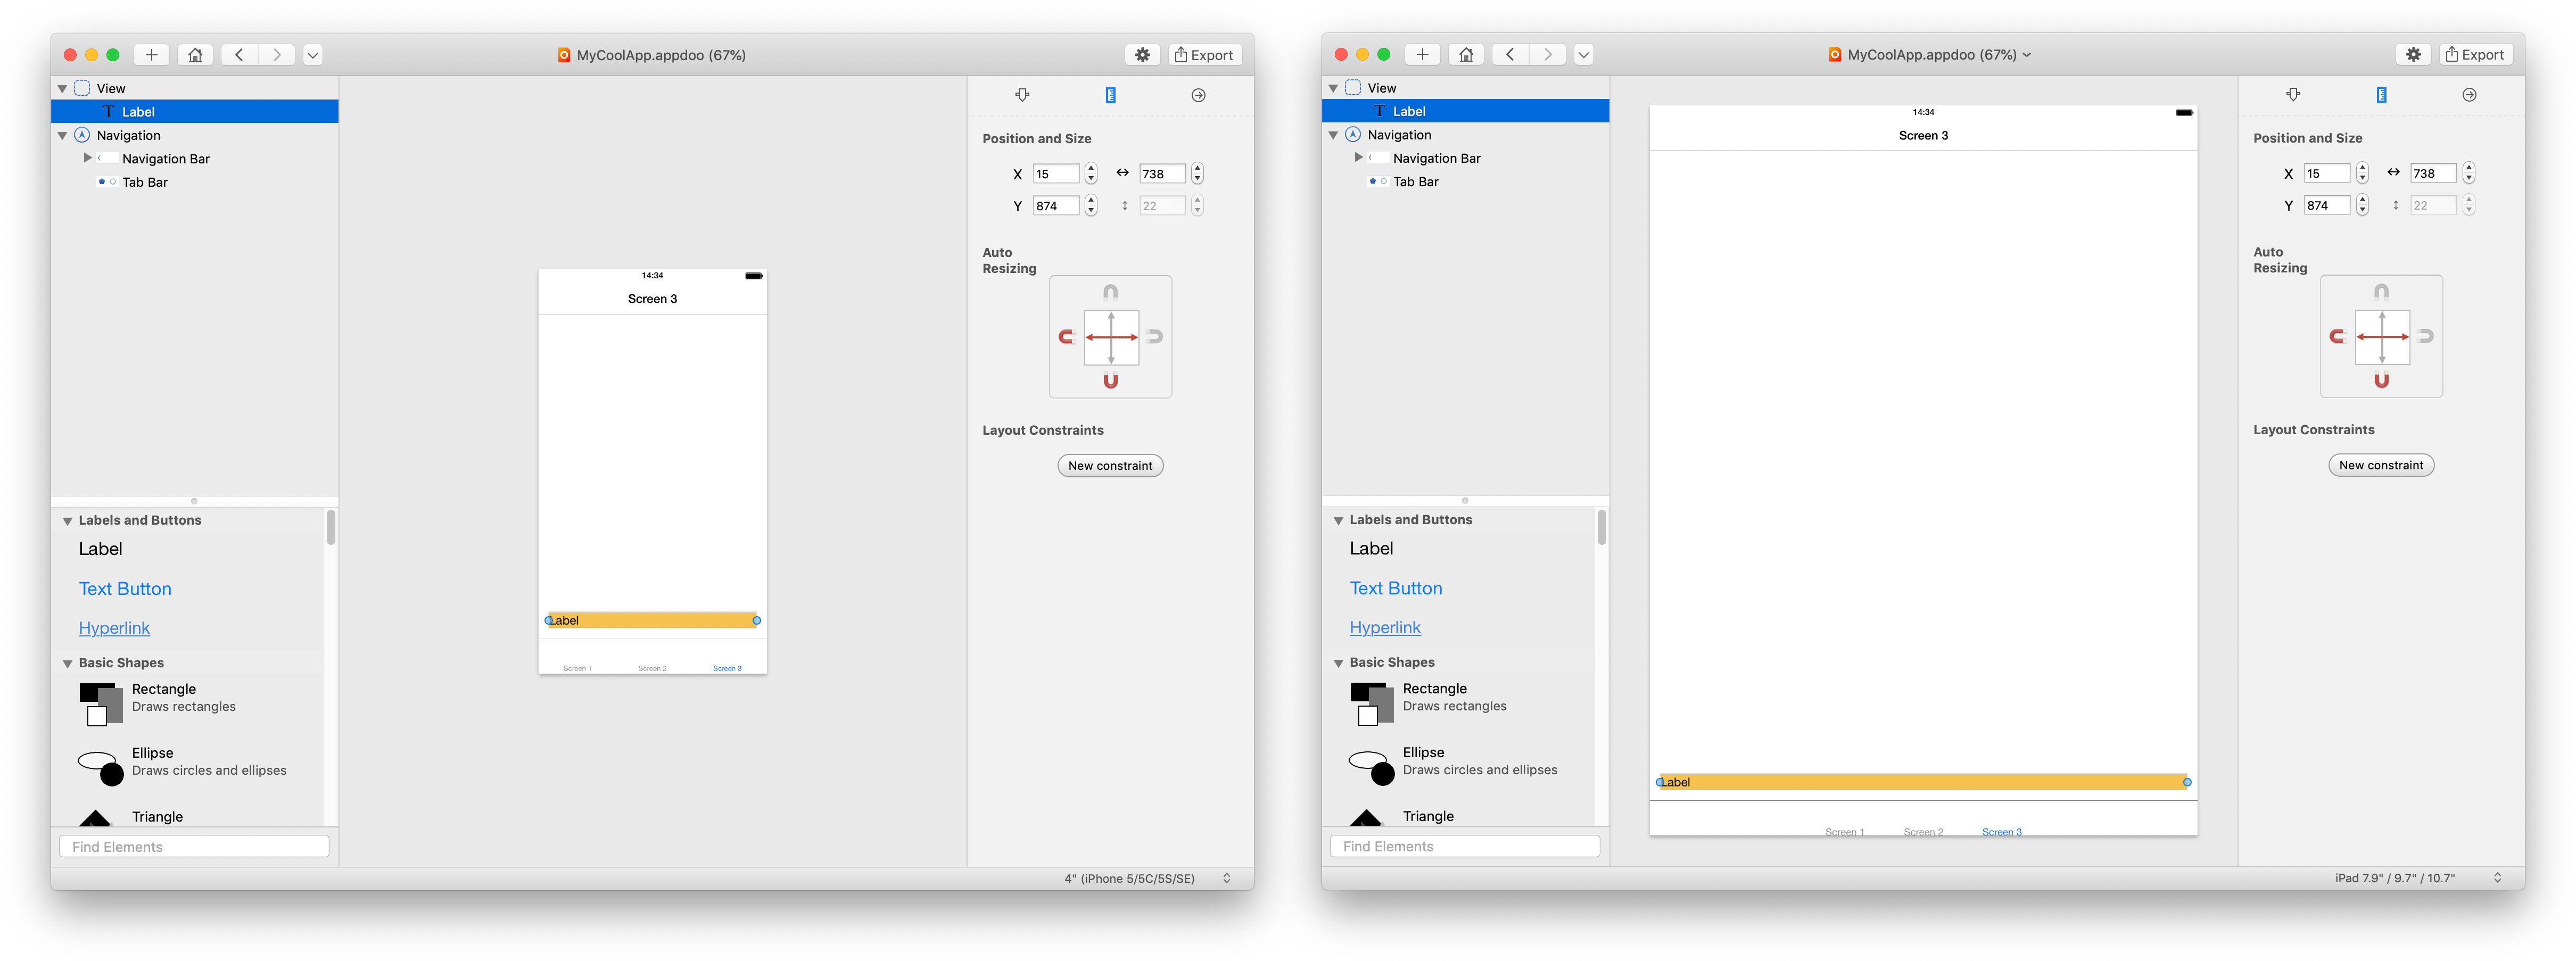
If you now select another simulator via the select box in the lower right corner of the appdoo window, you will see that the width of your label adjusts automatically. On the following image (enlarge) you can see this demonstrated by an iPhone (left) and an iPad (right).
Let us now change this example so that the label does not always remain at the top of the work space, but is always positioned exactly above the tab bar. Proceed as follows:
- So that we can do something with our label, it must of course be selected. Click on it and you should see a grey frame with the two blue dots on the right and left.
- Deactivate the upper magnet by one click. It will now be grayed out.
- Activate the lower magnet by one click. It is now displayed in red.
- Drag your label with the mouse downwards towards the tab bar until a blue dotted horizontal line is displayed.
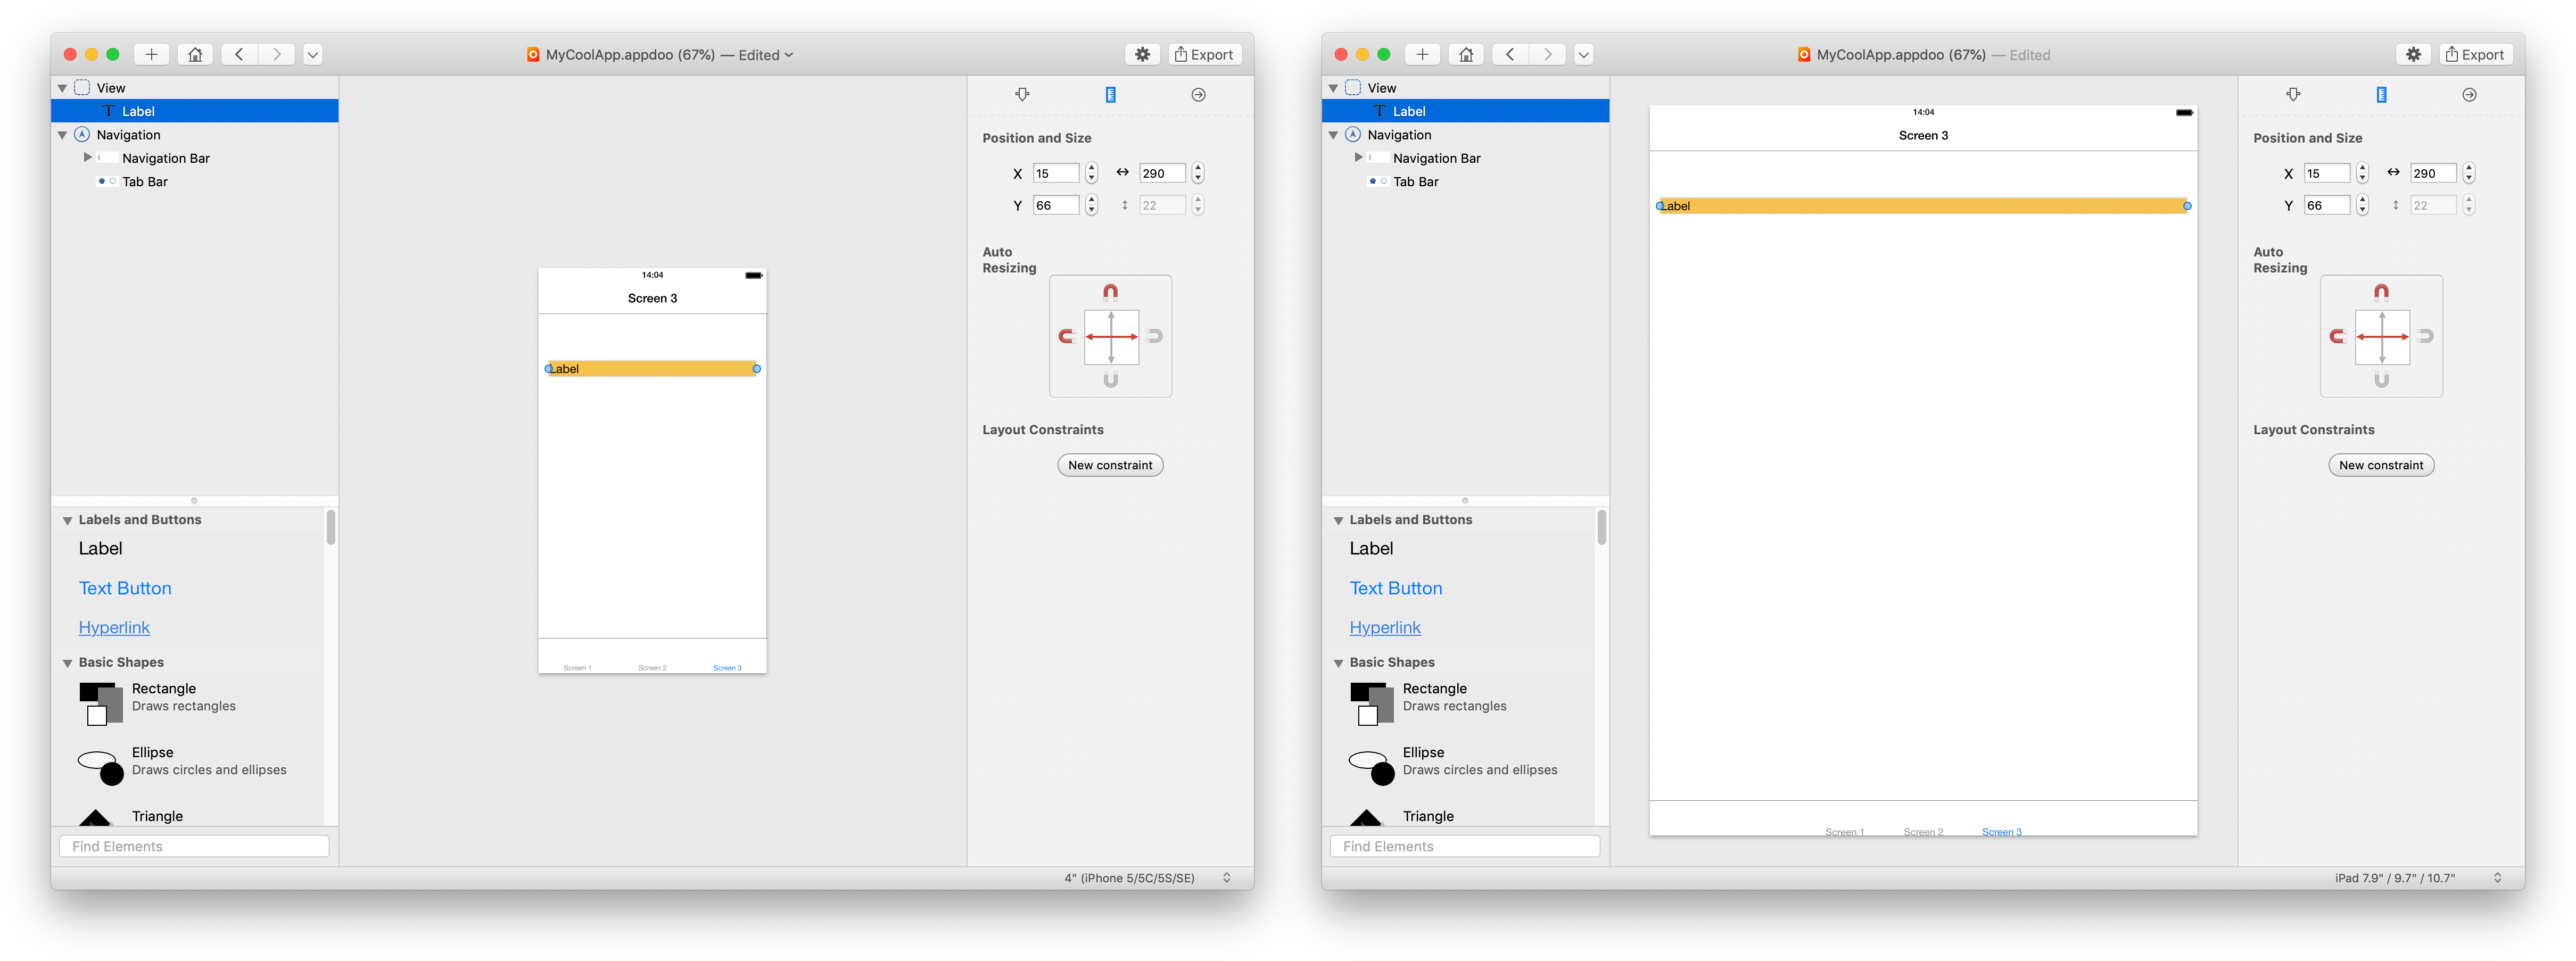
If you now switch between the simulators (select box at the bottom right), you will see that your label is always displayed just above the tab bar. No matter how high the screen is. On the following image (enlarge) you can see this demonstrated by an iPhone (left) and an iPad (right).